Call it frustration, call it an inferiority complex, call it what you will, but however much I like playing my octave mandola it’s always a struggle to be heard among the array of louder instruments that you’ll find at a session or jam. Anything which might increase the instruments presence is not to be disparaged. So when I first saw a Tone-Gard on a friend’s mandolin I was totally intrigued, and a quick bit of research did seemed to confirm that a longer sustain could be achieved (Review of the Tone Gard for mandolin).
But here’s the rub, and I’m not talking of the rub of my Octave Mandola against my six pack torso – all the commercial solutions were for mandolins and obviously would not fit my instrument (It appears that tone-guard.com stopped making custom sizes in 2018).
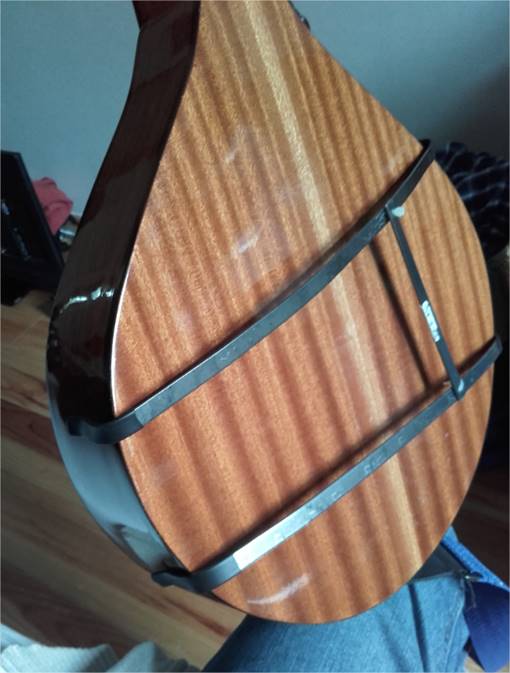
Sustain Frame Version I
I had seen Jon Chappell’s article A Do-It-Yourself Tone Frame for Mandolin & Ukulele and I was sure I could whip something up to at least test out the system. So after wandering around the local DIY store for an hour wondering what I could use, I came away with some soft steel and some aluminum bar and some heat shrink tubing used for electrical connections. A hour later I had a simple but effective frame which worked. Firstly with the steel and later with the aluminum.
The bars were simple bent to hug the body of the instrument and were held together by plastic ties. The elasticity of the ties actually acted as a spring, helping to hold the guard onto the body. Where the bar came into contact with the body I protected it with the heat-shrink plastic.
I played with this system for over a year and I was comfortable playing with it but I did have to replace the plastic ties which broke a couple of times and I added an elastic band to help give it more grip.
Sustain Frame Version II
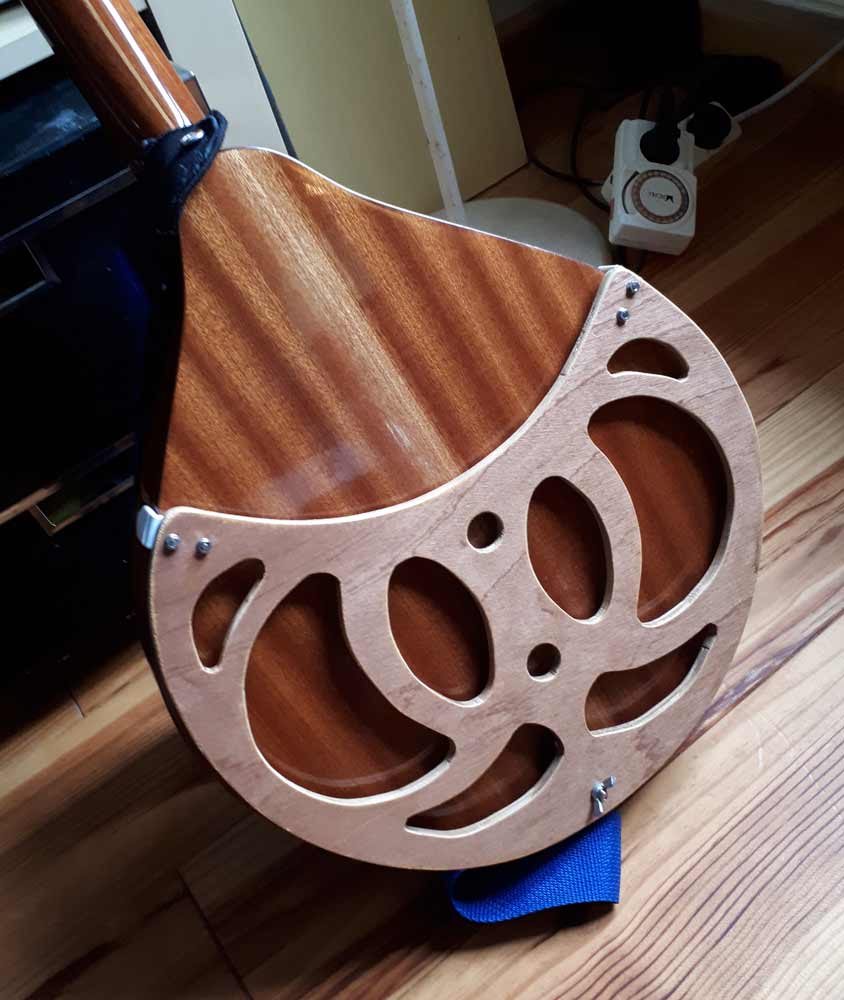
Taking into account the pros and cons of first protoype I looked for something a bit more permanent and solid. The fact that my mandola had a relatively flat back meant that it was possible to use a single solid piece of wood held on by small angle braces.
Materials
A piece of 4-8mm plywood.
A small piece of 2mm soft steel bar.
2 small right angle brackets.
4 x 3M 8-16mm flat headed bolts.
1 x 4M Flat headed bolt with wing nut.
Adhesive felt pads or adhesive anti-shock pads.
Electrical heat-shrink tubing
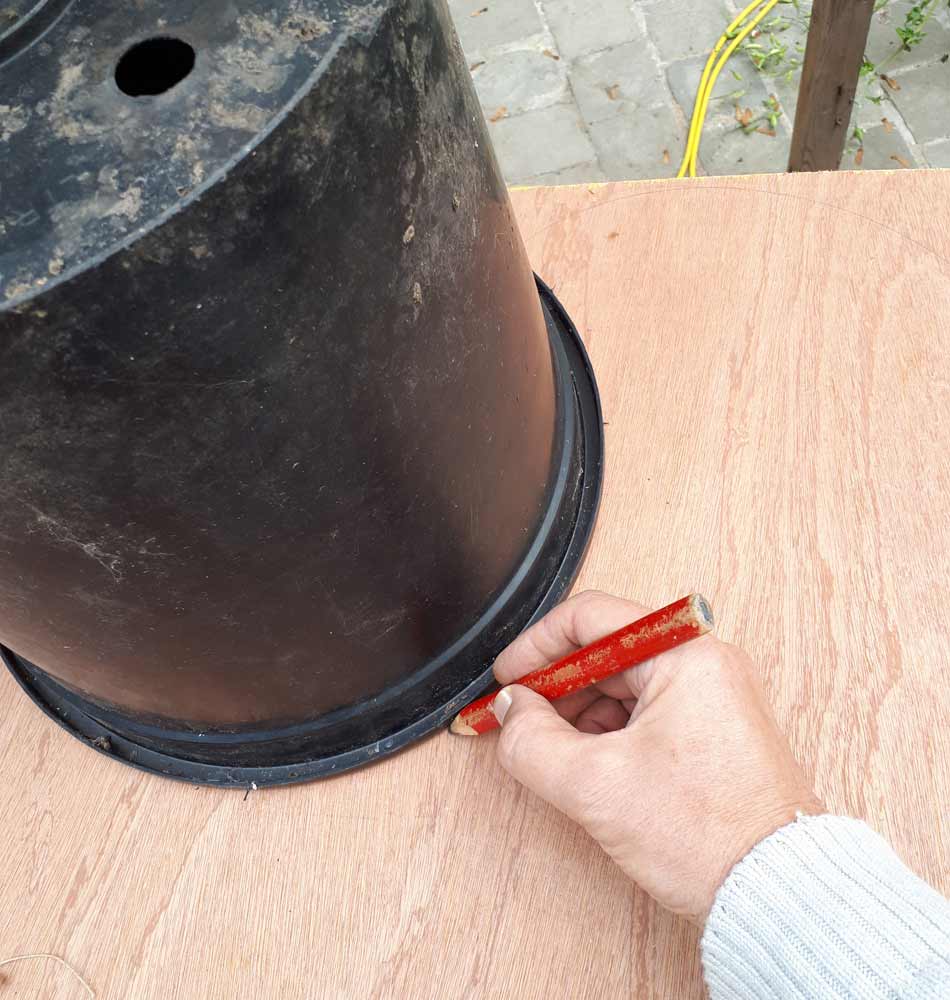
Step 1.
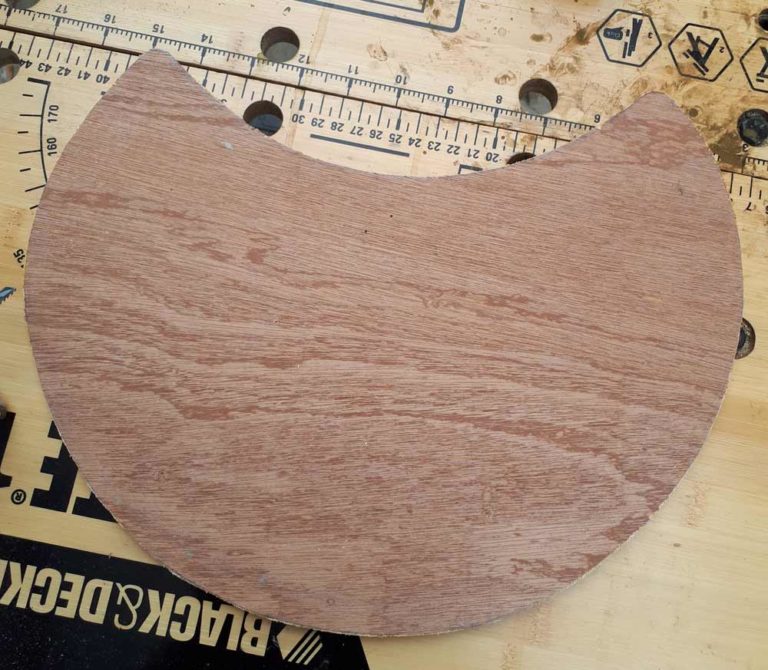
Lay the instrument on the plywood and draw a silhouette onto the wood, then outline the shape you want to have.
Step 2.
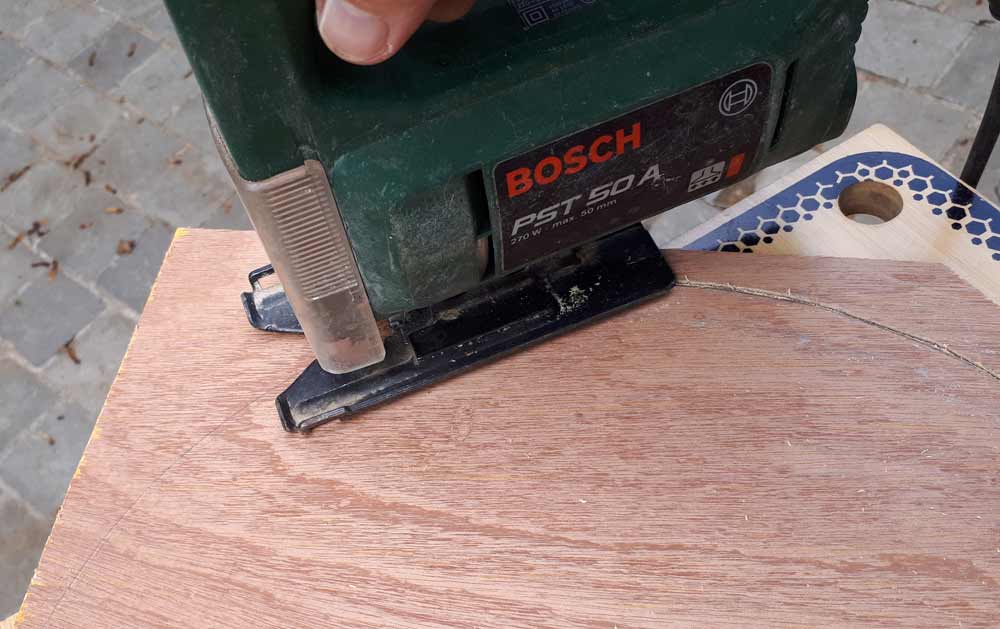
If you just cut into plywood with a jig-saw, even if it’s good quality, there’s always one side which is more damaged by the blade. There are a couple of ways you can limit this damage the one I prefer is by passing with a cutter along the line to pre-cut the top layer of the wood.
Step 3.
Place the plywood so that the cut line is on the top side facing towards, then cut out the basic shape keeping the jigsaw blade to the side of the line that you do not want to keep.
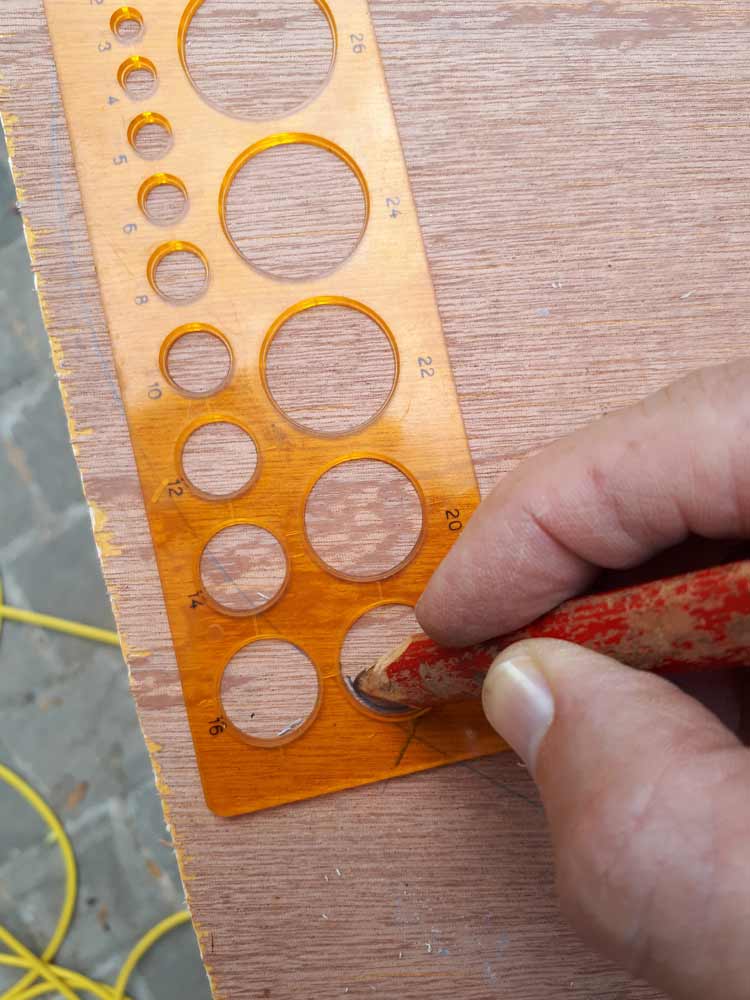
Step 4.
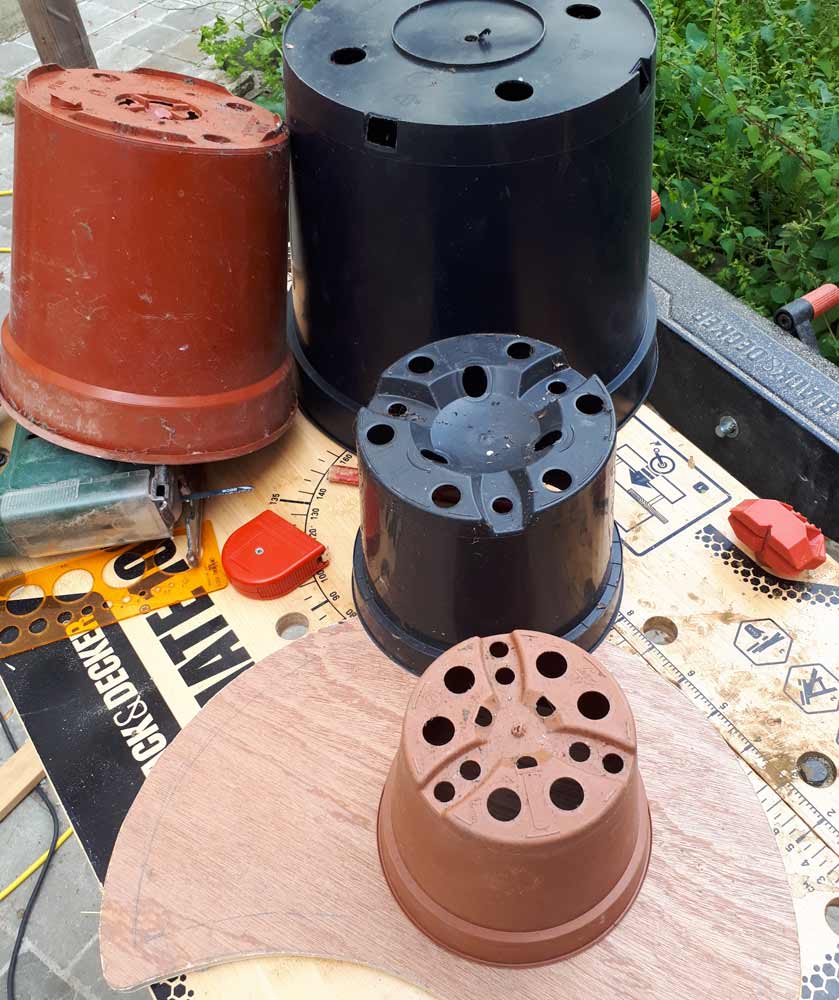
It’s of course possible to keep the wood as a solid piece but in order to lessen the weight you can take a lot of wood away. To find a nice design I played around with some flower pots and other handy objects until I had something I was happy with.
NB. I did use the cutter before cutting to ensure a clean cut. I also eliminated any sharpe corners from my design as they are difficult to sand down without and mini-sander such as a Dremel.
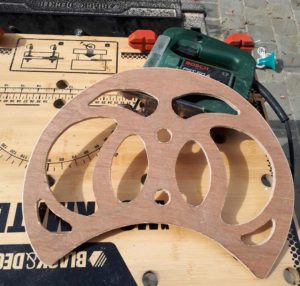
Step 5.
Once the basic shape is cut out it might take a bit of patience to sand the wood down especially on the internal surfaces. But once it’s done I suggest treating the wood so it’s easy to clean.
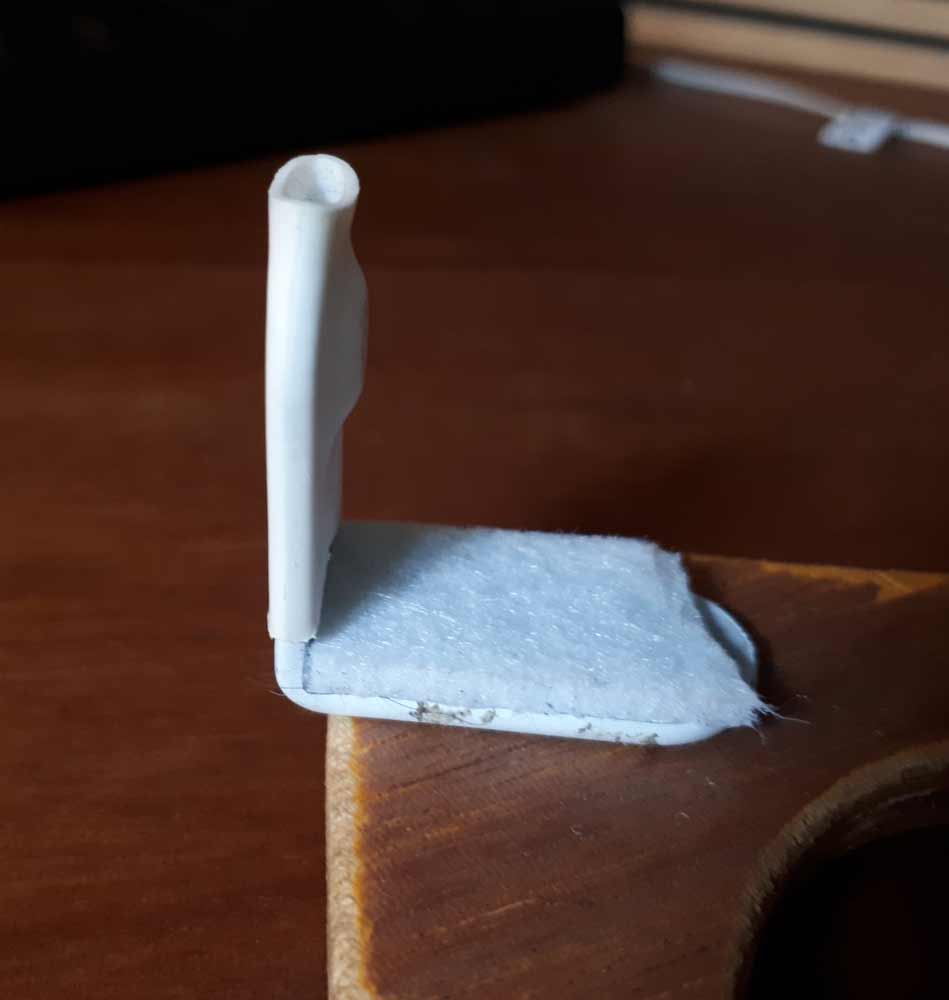
Step 6.
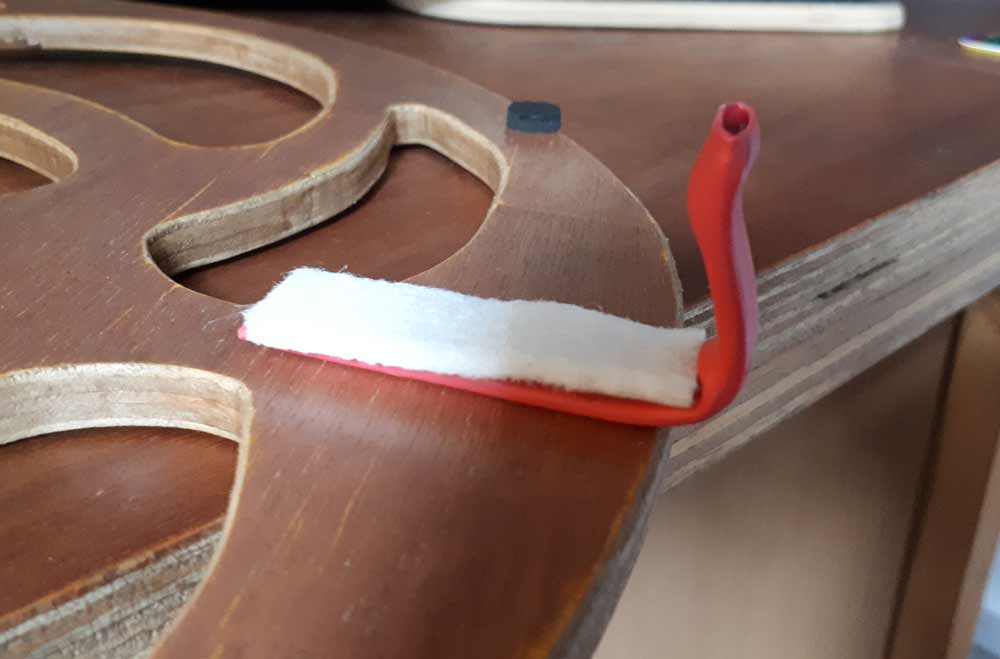
Attach the the right angled braces to the shoulders of the board using the 3M bolts. I used the bolts with the flat heads towards the instrument, but you could place the nuts towards the instrument and once protected with adhesive felt they’ll act as spacers, increasing the distance between the frame and the back of the instrument. I chose to protect the uprights of the brackets with heat-shrink tubing rather then felt because it grips the instrument better. Under the heat-shrink tubing I placed a adhesive anti-choc patch to ensure just one precise point of contact.
Step 7.
To ensure a tight fit a used a piece of soft steel bar to make a nice “s” shaped bracket. There’s a bit of flexibility in the bar so that the grip can be tightened if need be.